WordPress – add custom widgets on home page
I once had a desire to provide a list of shortcuts on the home page for my blog’s new users. I didn’t like the default WordPress’ blog page to be just a list of posts. I didn’t think that sidebar widgets grouping posts by date, category or tag would be helpful enough to grasp the versatility of the topics I cover here. I wanted to display a clear list of links with what a user can read about.
Table of contents
Introduction
As a first idea I thought I would display several boxes with links to different groups of users, for example:

In the following part of this post, I will describe how I customized my theme to display that information. The first part will be more technical, but in the last part I will share some doubts about UX.
I assume you have read WordPress – enhance any theme with footer widgets which describes the basics of adding new widgets section and provides a link to how to create a child theme.
Hey, I've been using WordPress for years. In fact, I have learned about a lot of useful plugins and I have done plenty of customizations to build a great blogging tool. Would you be interested in launching own blogging platform on WordPress?
Quick summary of the necessary steps:
- Copy
index.phpfrom the parent theme to the child theme. - Edit
index.phpto include new widgets area. - Register new widgets are in
functions.php. - Copy styles related to
#sidebarfrom the parent theme - Add widgets
- Add custom styling
Warning
Make a full backup of your site before continuing.
Copy index.php
The index.php file is responsible for rendering contents of any page which is not otherwise handled by other files. The process I describe could be probably applied to home.php file, but my theme did not provide it, so it was easier.
Please note that my Homepage Settings are Your latest posts. I haven’t checked if that method would work for A static page option.
So, make a copy of the parent theme’s index.php file and copy it to the child theme. This can be done using FTP.
Advice
The theme files are located in /private_html/wp-content/themes/ folder on the server.
Edit index.php
I edited that file in my child theme and added short code to display a new widgets area. I named that area sidebar-before-posts.
Take a look at lines 13-23. This fragment is quite generic, I just added a check to ensure that it will be rendered only for the “front page” – the home page that displays a list of posts. This can be tested by calling is_front_page().
Register new widget area
In order to register that widgets, I edited functions.php and added to my_widgets_init() function (created in the previous blog post) new registration (lines 15-25):
Copy styles
Now it was a tedious part to find and extract styles responsible for styling sidebar widgets, because I wanted to maintain the same look. For an unknown reason, the original theme’s authors decided to limit the styles just to the sidebar (#secondary .widget).
I found all relevant styles applied to #secondary .widget and copied them to my child theme’s style.css file. During this operation I replaced #secondary with .before-posts-widgets. I know this is duplication, but it’s better than editing parent theme’s files.
Add widgets
This was the moment to add my widgets to the new area to see how they were presented.
I went to Appearance > Customize > Widgets and found Before Posts area to be there. I edited it and added three Custom HTML widgets. I left the Title empty and put the following line to Content:
These widgets were very simple. Creating custom widgets with an interface to provide that information would be a very interesting, but also a time-consuming task, so for now, HTML is both clear and sufficient.
Add custom styling
At this moment I had the 3 widgets visible only on home page and styled alike sidebar widgets:
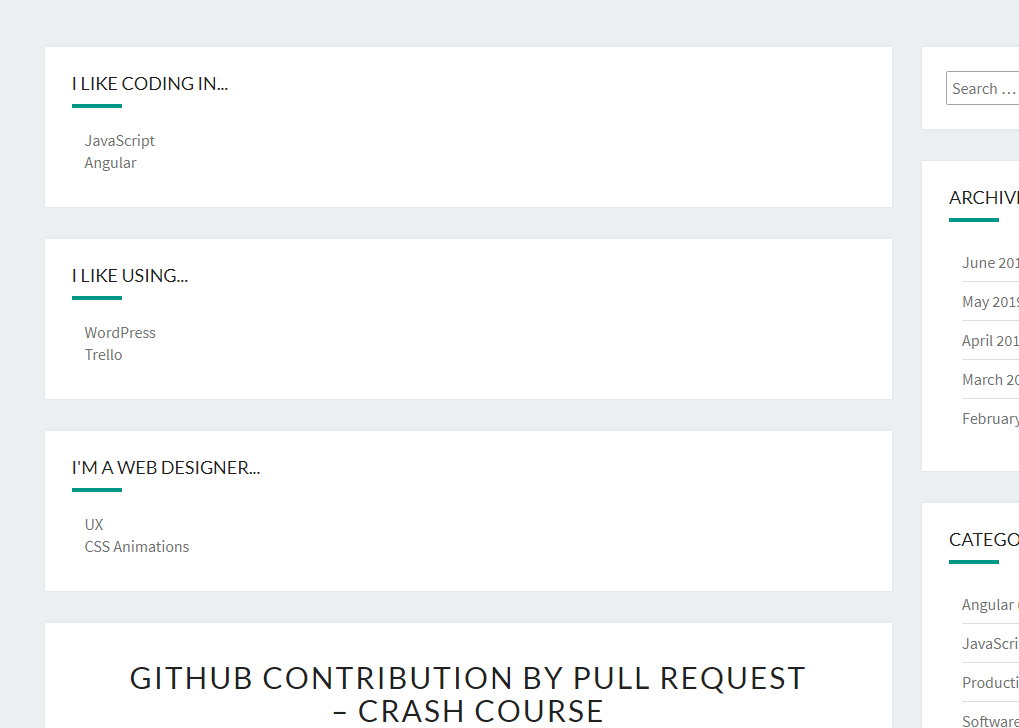
I wanted to distribute them in 3 columns and add a separator before the list of posts. This was fairly simple – I added flex display to turn rows into columns and the rest of the code is responsible for adding the separator.
The result was incomparably better:
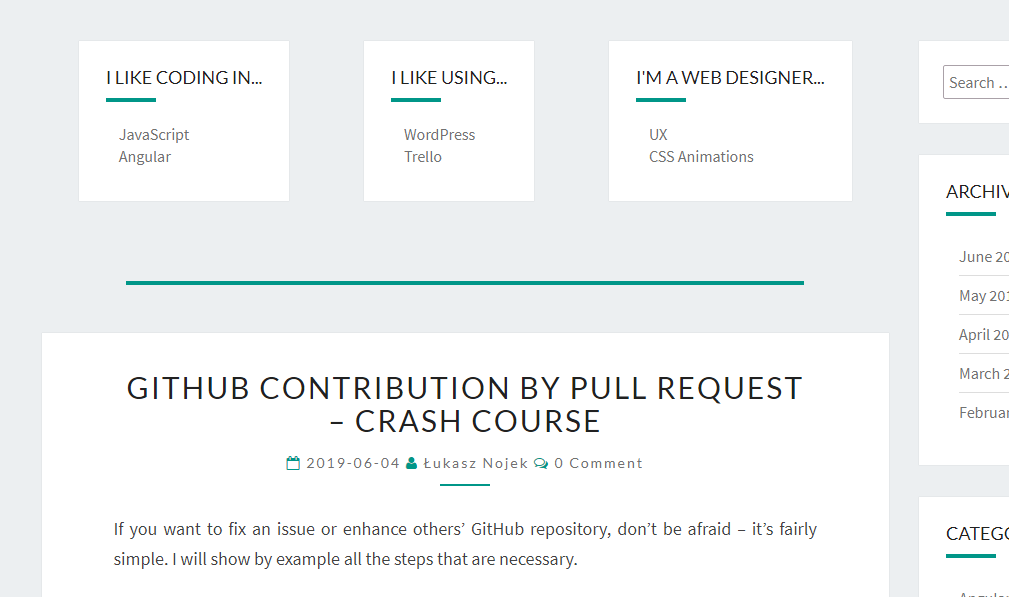
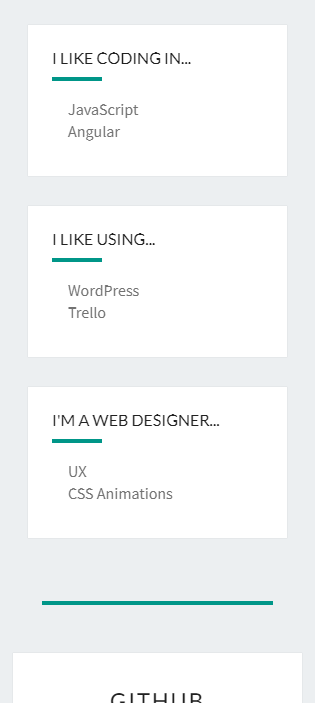
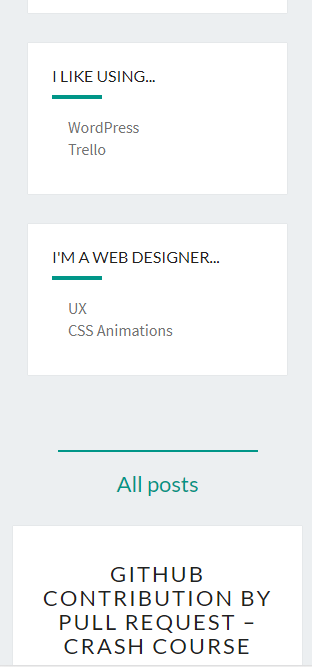
Two things were left: making the columns of equal width and making them responsible – readable also on mobile phones. I decided to switch from column to row layout (I know, flex-direction sounds counter-intuitive) when the screen was smaller than 750px. For that case, I also added vertical margins between the widgets, which were previously missing.
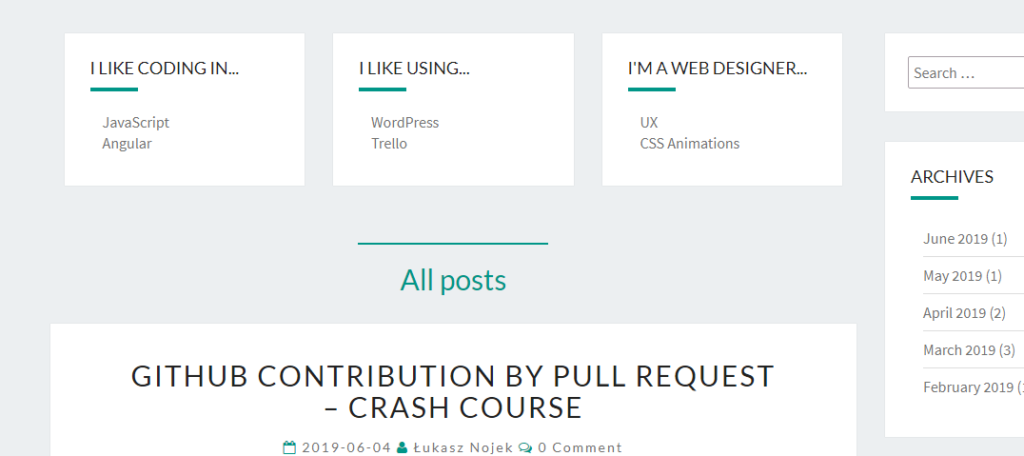
Home page in desktop:
and in a mobile:
Layout variation
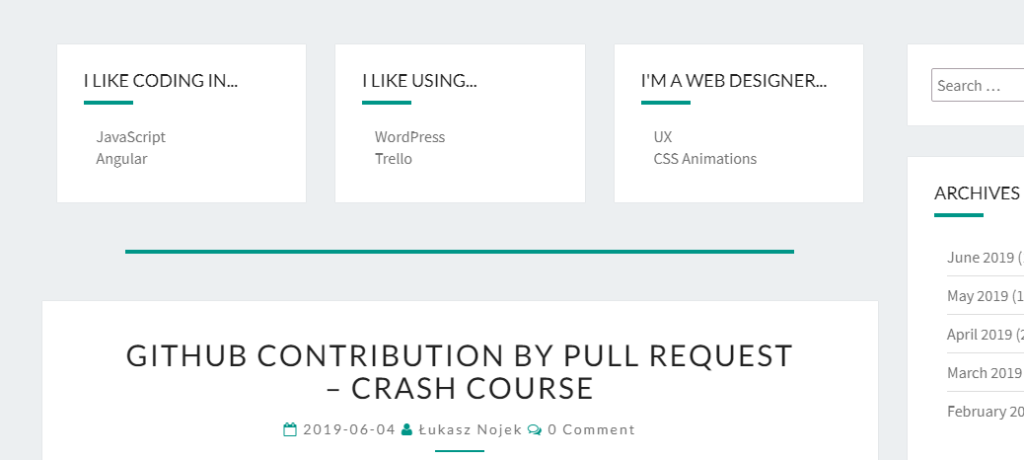
When I looked at these screens I wasn’t convinced a random user would know what is being displayed after that long thick green line. Is it another widget? A post? What kind of post? I felt I needed to support that section with a heading. So I removed that thick link and added a header instead.
In index.php I added line 11:
In style.css I removed the whole .before-posts-widgets::after and I removed margin-bottom from .before-posts-widgets, and added a rule for the header:
This is the result – desktop:
and mobile:
I think it looks better now.
More
You can find more about adding custom sidebars in my other posts: